Friday, March 20, 2015

Cerberus Alpha: File Format Problem and Small Update

I've been busy at work so it's been a while since the last update so I wanted to make a quick post. I've made a little more progress and handled the lettercase issue, but I'll talk about that in the next one. I was going back and forth through so many different editors that I made the mistake of saving a new version directly from Notepad on Windows. That caused some "file not found" errors when trying to run the program, although "ls" and "cat" could find the file fine. I opened it in nano and tried a few things. I didn't notice at first, but nano was saying something about MS-DOS mode, it was an easy to miss message. I found this little command very helpful:

head -1 yourscript | od -c

It would out put

0000000 # ! / b i n / b a s h \r \n

if the format was not correct and

0000000 # ! / b i n / b a s h \n
if the format was correct. As you can see, there was an invisible trailing carriage return after #!/bin/bash that was causing the issue. Apparently due to the MS-DOS text format. Following that there was a simple dos2unix command installed on my system that magically took care of the problem. I don't know if dos2unix is on TinyCore (was using Parted Magic at the time), but if it isn't I may include it. Although, best practice would be to use caution with your file formats because the problem is not immediately obvious.

Anyway, next time I'll talk about the lettercase fix that I made in 1.5 among other things. Hopefully the project will be complete in the next couple weeks!

Here are some screenshots of the main menu:

And Cerberus Alpha's "title screen." Enter 'a' at the main menu.

Monday, March 16, 2015

Cerberus Alpha: NTFS File Systems and Letter Case Headaches

On my test virtual machine I formatted the drives as FAT-32 without thinking, but in reality many Windows drives are formatted as NTFS by default. When I actually tried my test CD, it gave me an error stating that the file system was read only. I thought this was due to some error in the implementation of the mount function, so I tried a few modifications to that. When I finally got around to searching the internet for advice I found that the version of mount on TinyCore Linux by default does not have the ability to mount NTFS file systems. Tiny indeed!

To take care of this issue, all I had to do was add "ntfs-3g" into the list of utilities that my remastered OS would load. With that installed, mount would load the Windows file systems as read-write and cp worked as expected. Before I figured this out, I thought that my output suppressing statement was an issue (1>/dev/null 2&>1) was causing the issue and it actually did actually seem to be a problem because it seemed to mount the file system to /dev/null. I may have to take a look back and see if I can put that back in and it will still work.

The next major issue is one of letter case. I can expect certain files to be named differently depending on the OS:
  • Windows XP:
    • /WINDOWS/system32/
      • utilman.exe
      • sethc.exe
      • cmd.exe
  • Windows 7:
    • /Windows/System32/
      • Utilman.exe
      • sethc.exe
      • cmd.exe
  • Windows 8:          (need to confirm)
    • /Windows/System32/
      • Utilman.exe
      • sethc.exe
      • cmd.exe
I can't say for certain that these are the only possibilities, but at the very least there are two paths and two file names I could encounter. One shortcut I could take is to tell cp to access /*indows/*ystem32 and *tilman.exe, but aside from the fact that ignores the all-caps version of "WINDOWS" this still has a big problem. What do I copy to? If I copy *tilman.exe toutilman_bak.exe for example, how do I know whether I need to copy cmd.exe to Utilman.exe or utilman.exe?

I've come up with a few solutions, but none of them I really like. At the moment, the program assumes you want the Windows 7 version if you're copying Utilman, and the Windows XP version if you're copying sethc.exe. I could assume that Windows doesn't care about the case of Utilman, and then just only deal with the "windows" case issue. Or I could make the "thorough install" option attempt to copy all different possible versions, starting with the most likely. That would slow it down though. I also read something about a "no-case glob" option in bash, so I will have to explore that.

This case issue is what I'm working on at the moment. Another issue I'm working on is that my message regarding number of successful installs does not count correctly, but I may just scrap that idea as it's not very important.

Saturday, March 7, 2015

Cerberus Alpha: Remastering the OS to Load the Program on Boot (Part 2)

Hello! I decided to take a break from the project, and the write up, because I got really busy at work and had to do some traveling. I will get back to the project when I can, but for now I'm going to fill in the rest of the write up while I can. I'm going off of memory at this point, so some things might be less detailed than I'd like.

When we last left off, I had finally discovered the correct method for integrating my program into the remastered iso of TinyCore Linux. The next step was to find the correct place in the boot process to load the program. Some of this really happened side by side, but I thought it would be better to describe the process in two parts. This was really a learning process for me because I needed to find the right time to run my script and TinyCore seems to have an atypical boot up process.

As mentioned previously, my first attempt was to place cerba.sh in /opt/ and modify /opt/bootlocal.sh to start cerba. According to the TinyCore Linux wiki, bootlocal.sh is run "later in the boot process." Unfortunately, it was not late enough. I tried a few implementations of this (changing around the order in bootlocal.sh), but they never worked. The behavior was that it would start cerba.sh, but the behavior was that it would run in an infinite loop (at the main menu) and ignore user input. It seems as though the bash interpreter was not yet running and that bootlocal.sh is more for things like selecting the keyboard layout.

If you search around the internet a bit, the bootlocal.sh option is mentioned a few places, as is placing your script in .X.d to boot, but this would not work because that only runs after the X window system has started and I did not want to wait for that process. My next attempt was to place start cerba from /root/.profile. This was good because it ran the script as root user, but it still had the flashing / looping issue. I tried /tc/.profile (tc is the default login user), but it still had the flashing issue. Another issue that I had was when calling on the script from the .profile I originally placed "exit" at the end of cerba's quit function. This would either exit the boot process entirely, or it would log out the existing user, interrupting the boot process awkwardly. There were other issues encountered that revolved around mounting the file systems and other commands in the script, but I can't quite remember when they were resolved. Either way, it had to do with running cerba at the correct time once all the utilities had loaded.

My next attempt was something that I had to do a little digging to figure out, but once I had it this was essentially the correct solution. I put the script in /etc/profile.d/ and this time it ran correctly without any errors (related to its placement in the boot process at least), except for one. When the program ran, it worked fine, but when I chose to "quit" from the program it would rerun itself! As it turns out, the program was being started from /etc/profile.d/ every time the user logged in, so when I quit the program it tried to login again and reran cerba. My simple solution to this was to place cerbastart.sh which was simply a script that did "sudo cerba" and then "rm /etc/profile.d/cerbastart.sh ." This was my way of ensuring that the program ran once and only once during the initial login. The added benefit of this is that cerba will run once and then continue to boot normally, including into the X window system if that boot option is chosen.

Around this time I placed a copy of the script as /usr/bin/cerba which meant that I could run the program just by entering "cerba" in the terminal. Every thing seemed to be working perfectly so I burnt a test CD and tried it out on my machine at home. When I ran it, though, there was an error about the file system being write protected! This was my next major hurtle, and later the problem of letter case would raise its ugly head again.

Friday, February 20, 2015

Cerberus Alpha: Remastering the OS to Load the Program on Boot (Part 1)

Building a new iso for TinyCore was really easy enough, so the first thing I experimented with was adjusting boot behavior to what I wanted. The default option that I wanted was that Tiny Core would boot directly into a root command line interview. This is done using the boot code tinycore superuser. In ezremaster I made the mistake of entering only "superuser" instead of the whole phrase. With that fixed and the boot behavior working as desired, I set out to have the program run automatically. This proved quite the challenge.

When ezremaster creates the new OS for the .iso, it builds the actual folders that will go into the iso into a directory called "extract." Inside this is the actual system folders that will be extracted when the iso boots, such as /opt /etc and so on. What I did at first was to copy cerba.sh into the /extract/opt and modify bootlocal.sh with a line to start the script. Although later on I would need to start the script later in the boot process, this was not a problem yet. Modifying things this way caused the iso that was created to be "corrupt" and it would not boot at all.

Earlier in the project I had been able to modify the boot options by opening the iso and changing /boot/isolinux/isolinux,cfg, so I tried editing files inside the already built iso and rebuilding it with MagicISO. Specifically I went into /boot/core.gz/core.cpio where /opt is located. This idea didn't completely break the iso, but on boot I would get the errors "/boot/core.gz not found" (when core.gz was not named perfectly) or an error stating that there was a kernel panic.

After much searching I never found information on how to do what I wanted correctly. Fortunately, I eventually found the solution in ezremaster. In ezremaster there is an option to integrate backed up user data into the iso. Originally I didn't think this would work, but when I tried using this it did actually work. Here are the steps I had to follow to use this feature correctly to produce the iso with both the custom /opt data and :
Place cerba.sh in /opt of the running system
  • Edit /opt/bootlocal.sh to start /opt/cerba.sh (*)
  • In TinyCore's Control Panel, backup /opt/ as mydata.tgz somewhere
  • Use /mnt/sr0 (mounted CD) as base iso
  • Load mydata.tgz into ezremaster
  • Load extensions using "Extract TCZ in to initrd" option and "Run TCZ startup scripts in chroot now"
    • bash
    • nano
    • ncurses-utils
    • ntfs-3g (*)
  • Build the iso
* Later the correct place to boot from would be /etc/profile.d/cerba.sh and ntfs-3g was discovered to be needed

With all this work done, I finally had a working iso and it was correctly running cerba.sh from bootlocal.sh. Unfortunately, as it turns out, this was far too early in the boot sequence.

Friday, February 13, 2015

Cerberus Alpha: Tuning the OS for the Program

By now (version 0.B perhaps?) I had a mostly functioning program and it was time to set to work implementing it into the boot sequence. I implemented a function to try to mount all hard drives (still needs work, more on that later) and turned the main menu into a function of its own.

Everything was not working correctly yet and one of the first problems was that the Bourne Shell (#!/bin/sh) was not correctly interpreting the script. Since this script was written to be interpreted by Bash I changed the 1st line to #!/bin/bash. I then had to install the bash interpreter itself and from then on it worked. Fortunately, Tiny core has a very simple and easy way to install programs from the desktop. As a result of installing bash, ncurses was also installed as a dependency which I like because I'm a fairly big fan of ncurses based programs (wavemon and nano to name a couple).

Speaking of nano, that was the next thing that I installed. Personally, I can't really stand vi. In my opinion, nano is much easier to use and I like emacs too. I know some people really love vi and vim, so don't let me stop you. I wouldn't really need a text editor in the final version, but since I was still working on it I decided to leave it in. It doesn't add a lot of time to the boot process or the .iso size, so I think I will leave it in permanently in case anyone using the CD could use a text editor. A good text editor.

Oddly, there was a single command in my script that was giving the interpreter trouble still, tput. I was using tput to print out a warning in reverse-red text, but it was giving me an error. It turns out that for tput to function it requires ncurses-utils to be installed. Well, ncurses-utils is not very large and it looks like practically the only thing it does is for tput, so I installed it. I ended up taking out this warning later so I may actually get rid of ncurses-utils altogether, but for now it stays in.

At this point I'd like to mention that I had to install ezremaster in order to remaster the OS. Technically I didn't need it to do the remaster, but it was a great deal of help. Actually, whoever created ezremaster should really be commended. Once I understood how to use it correctly, it actually made remastering an EZ and painless task. I did not leave it installed in the final .iso, because there is no need for it.

Around this time I started working on actually getting the program to run at the correct time, which I eventually did, but much later on I ran into another problem which called for a new program to be installed. When I had everything working perfectly, or so I thought, I burned the .iso to a CD and gave it a shot in a PC at home. It came back with errors telling me the file system was read only. After much investigating, I discovered that TinyCore does not support writing to NTFS file systems out of the box. I guess I must be spoiled by working with such "bloated" Linux distros as Slitaz and Lucid Puppy. Anyway, I found that the program I needed was ntfs-3g. With this installed, it was working well again. One cause of the problem was that I mistakenly formatted my 3 hard drives (in VMWare) as FAT32 instead of NTFS.

Friday, February 6, 2015

Cerberus Alpha: Tuning the program for the OS

The first challenge that I ran into was with the nifty little line drawing characters that I used to make the menu boxes look nice. Writing the program for the first time I copied the box drawing characters off of the wikipedia page about them. This worked fine in testing, but when running the program for the first time in Tiny Core the boxes looked like fuzz and when editing the program it was like garbled text. It turns out that the terminal emulator (aterm) that runs from the desktop in Tiny Core does not support the UTF-8 characters I was using. I found a workaround that looks like this:

echo -e "\e(0lqqqqqqqqqqq\e(BMenu:\e(0qqqqqqqqqqqqqqqqk\e(B"
echo -e "\e(0x\e(B Enter 1: Simple Install        \e(0x\e(B"
echo -e "\e(0x\e(B Enter 2: Full Install          \e(0x\e(B"
echo -e "\e(0x\e(B Enter 3: Simple Uninstall      \e(0x\e(B"
echo -e "\e(0x\e(B Enter 4: Thorough Uninstall    \e(0x\e(B"
echo -e "\e(0x\e(B Enter q: to quit to terminal   \e(0x\e(B"
echo -e "\e(0x\e(B Enter r: to reboot             \e(0x\e(B"
echo -e "\e(0mqqqqqqqqqqqqqqqqqqqqqqqqqqqqqqqqj\e(B"
Although it looks a bit like crap in the code, it did actually render very well when running. It uses the escape character \e(0 to begin inputting text in alternate characters and \e(B to end this input mode. This change worked for the terminal emulator aterm, but later on when I was running the program from the command line without X the problem reared its ugly head again. I reverted the menu section code back to what it was originally (actually I rewrote it a bit more carefully) and once again it gave the desired printout. Technically, if you rerun the program from aterm it will still give ugly looking output. Hopefully at some point I will get around to writing a check for what environment the program is running from to fix this issue. Here is what the menu looks like, at least when it works right:

┌───────────Menu:────────────────┐
│ Enter 1: Simple Install        │
│ Enter 2: Full Install          │
│ Enter 3: Simple Uninstall      │
│ Enter 4: Thorough Uninstall    │
│ Enter 5: Replace sethc instead │
│ Enter q: to quit to terminal   │
│ Enter r: to reboot             │
└────────────────────────────────┘
You might by now notice the "replace sethc instead" option in the program has no "uninstall" function. This was intended for Windows XP as an alternate method. It works, but there are already much better programs out there designed to do the same thing for XP. It could be used as a last resort for Windows 8 too though, so I will try to get around to adding the option to undo it.

Tuesday, February 3, 2015

HP 8116A Review

Last week I reviewed the HP 8904A and this week I am reviewing the HP 8116A that I got with it. There is a bit more information out there regarding this model, but I felt like I would give my opinion on it anyway.


The front panel above is darker and not like any other test equipment that I have. It may be similar to other HP equipment of the same vintage, but I haven't seen any examples myself. Four main controls for settings are large rocker switches. The left three control the displayed digits (up / down) while the fourth controls "range" (essentially orders of magnitude). I think these buttons are quite neat and they are very intuitive and fast to use. One minor drawback is that there is no way to direct input a particular setting, but I don't think there are enough digits for that to really be a frustration. Also, if these keys were below the individual digits it would be just a little clearer what digit you are changing. Buttons under the LED display select what parameter you are adjusting.

The first thing that is immediately striking that I noticed about the HP 8116A is the absolutely gorgeous board inside the unit. Before I even opened the case I saw the thick golden traces shining through the vent holes in the bottom.


What a thing of beauty. You can see on the bottom of the lower board that there are plenty of nice big traces that are gold plated. I'm not sure whether the traces are exposed (no solder mask) and got plated during an immersion process or if they were plated and then coated with a very thin solder mask. Consider that a missed opportunity that I didn't get out my DMM and test the continuity to find out. It is certainly unusual to see a board like this that is not part of an RF section now.


Below is the top board which also has gold traces. It seems that it may have some interior layers. The layout and routing is very professional and most likely done with computer aid. I have not taken the time to catalog all the ICs, but I would guess were may be looking at a processor, some RAM and other peripherals. Although it might be the front panel controller as well since the ribbon cable goes directly to the front panel and the generator circuitry is likely to be on the bottom board.


Performance-wise the HP 8116A is presented as a 0-50MHz function generator. It can produce sine, triangle, square and pulses and can modulate its output as AM, FM or PWM. It also has some nice trigger and gating options as well as the ability to be used as a VCO.


As the modulation was one of the main features I was interested in using it for, I was happy that it produces a nice clean modulation throughout its range up to 50MHz. It produced 100% with a 5 V (amplitude) 10 kHz signal (above) and will go beyond 100% modulation if you want it to. That was a source of some confusion as the manual states that 100% modulation should be achieved at 5 Volt amplitude (the setting was 2.5 V amp.), but I believe that comes from the fact that the HP 8904A I was using as a modulating signal produces 5 V amplitude terminated into 50 ohms, but 5 V peak when terminated into high impedance. It should also be able to produce DSBSC with +2.5 V / -7.5 V modulating signal, but I was not able to produce enough DC offset for this with the HP 8904A.


As far as frequency accuracy goes, I think it is "pretty good" although it requires a fair bit of warmup time (typical for test equipment of this vintage). To be fair, I don't know whether the HP 8116A or my spectrum analyzer is out of calibration, but I think its accuracy is good without being necessarily absolutely precise. It seems to be off by about the same value so it may just need a calibration.


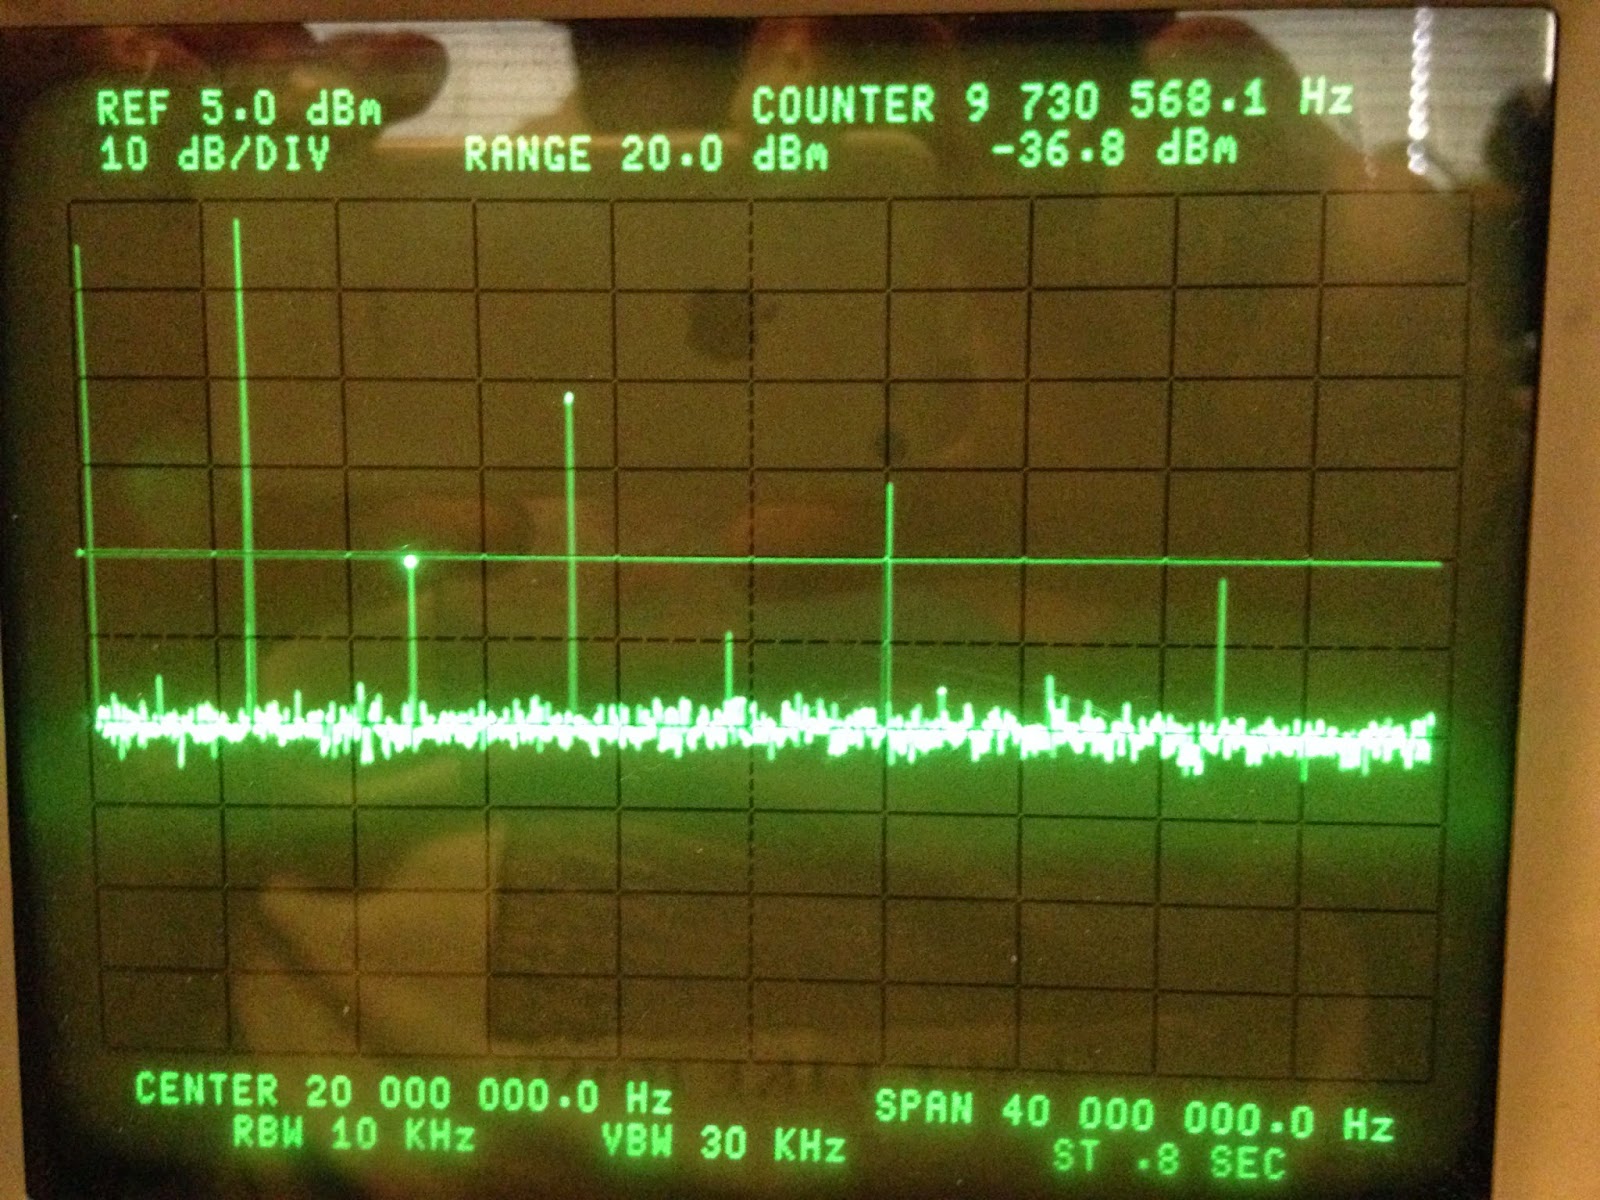
Its spectral performance is good and going through various wave shapes and looking at their spectra works out like an exercise in academic procedure. All the harmonics are where you'd expect them for sine, square, triangle and so on.


Above you can see a large amount of ringing in the scope shots, this is due to the lack of a good 50-ohm  termination on the oscilloscope and not indicative of the actual function generator performance. In my opinion it has very good performance, even producing square waves, well up into its operating range as shown below.

50 kHz square wave (left), 25 MHz square wave (right)

The HP 8116A can produce its waveforms with some fair DC offset and (using the duty cycle setting) can produce skewed triangle or sine waveforms (not necessarily a common feature with modern function generators). Below is an example of using the gate input to produce "bursts" of 50 MHz sine wave.


Below are some examples of the unit performing FM modulation that I could not find a place to fit anywhere else. It seems to be very stable, but I am not sure how to judge the "quality" of its FM modulation. I also tested the PWM and VCO functions and they worked well, but do not make for very interesting pictures.


Taken all together, I am very pleased with its performance. It doesn't have the convenience of a modern instrument or the ability to produce arbitrary waveforms. With a calibration, though, I think it would still contend as a useful piece to have around and I am certainly happy to have found it.